This guide walks you through building your first TapeSurf workspace. You’ll add widgets, customize markets, and organize your board—all in under 5 minutes.
Adding Your First Widget
Widgets are the building blocks of your TapeSurf workspace. Each widget displays specific market data - order books, price tickers, trade feeds, etc.
Let’s add your first Order Book widget:
- Click “Add widget” in the top navigation
- Select Order Book from the widget types
- Search for “BTC/USDT” in the market selector and select it
- Drag “Drag to layout” button to place the widget on your board
Next step: Try adding different widget types to your board. Each widget has unique features—explore the individual widget guides to learn more.
Widget Controls
After adding widgets, you can customize which markets they track and adjust their display settings.
Hover over any widget’s tab bar to reveal control icons on the right. Icons only appear on hover to keep your workspace clean and focused.
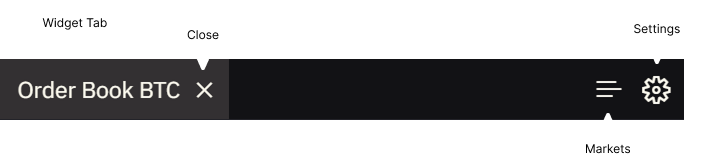
Managing Markets
Track different trading pairs by adding or removing markets. Click the icon to open the Markets panel.
TapeSurf provides access to every market on supported exchanges—no curated lists or selective availability. When exchanges list new trading pairs or new exchanges are added, they’re immediately available for tracking.
Add a market: Click → Search trading pair (e.g., “BTC/USDT”) → Select from results
Remove a market: Click next to the market name
Note: Widgets limited to one market won’t show if a market is already added. Free users have access to major markets—Pro plan unlocks all exchanges and trading pairs.
Widget Settings
Click the icon to open the Settings panel. Each widget type has different settings available - display options, visual preferences, data grouping, and more.
Changes apply immediately, no need to save.
Note: For detailed explanations of settings available in each widget type, check the individual widget guides.
Boards & Layout
As you add more widgets, organize them across multiple boards for different trading strategies.
Boards are separate workspaces that each have their own widgets and layouts. Use them to organize different setups - one for BTC analysis, another for altcoins, another for futures trading.
Switch boards: Click Boards in the top navigation → select from dropdown
Create new board: Click Boards → click → choose:
- Empty board - Start fresh with blank workspace
- Copy current - Duplicate all widgets and layout
Note: Multiple boards are available on Pro plan. Free users can explore all features on a single board.
Delete board: Open Boards dropdown → hover over board → click delete icon
Move widgets: Drag widget tabs to reposition them within a board
Tip: For advanced layout options like split panels and keyboard shortcuts, see the Layout Management guide.
What’s Next?
You now know how to add widgets, manage markets, and organize boards. Ready to go deeper?
Learn advanced layout:
- Layout Management - Split panels, copy widgets with Ctrl (Windows) or Cmd (Mac) + drag, and use keyboard shortcuts
Master specific widgets:
- Order Book - Understand liquidity depth and order aggregation
- Watchlist - Monitor multiple markets and sort by volume
- Order Book Heatmap - Visualize price action with order execution heatmaps
- Ticker - Track single-market price movements
- Trade Feed - Watch live trades and liquidation events